
Table of Contents
Did you know?
You can eat your photos!
Embarking on the delightful journey of crafting a cake with a photo, this guide is your quintessential companion for creating an edible masterpiece that merges taste with personalized artistry. Diving into the realm of photo cake design, we unravel the secrets to transforming your favorite snapshots into the centerpiece of your confectionary creation. Whether you’re celebrating a milestone, cherishing memories, or simply seeking a unique dessert experience, this photo cake recipe is designed to guide you through each step with ease and creativity. Prepare to enchant your guests and indulge in a cake that’s as visually captivating as it is delicious.
Learn How To Make A Photo Cake
Photo cake recipe is 100% edible, made from frosting pressed ultra-thin onto a baking sheet. Images are created with an inkjet printer and edible inks. Images come out sharp and clear, just like the original picture. Also known as cake stickers, cake toppers, photo cakes, picture cakes, and frosting sheets, these edible images are FSSAI and Kosher approved.
You can make your own photo cake ideas and treats with edible memories quickly and easily. Everyone can do it; no experience is necessary. Edible images do all the decorating for you! Simply peel and place photo edibles on your frosted or chocolate-covered treat to create beautiful and professional-looking cakes and desserts. Frosting sheets can be used to adorn the top of your cake, also known as cake toppers. Cake toppers can also be used to decorate cupcakes, cookies, and brownies, creating amazing treats that will be the hit of the party.
Edible images can be purchased for mere value for a full sheet measuring 7.5″ x 10″, (3) pre-cut strips measuring 2.25″ x 10″, which will cover an 8″- 10″ cake, and (12) 2″ round images for cookies and cupcakes. Edible pictures can be fully customised to your desired size, as well as imprint a personalised message.
It is so much making beautiful desserts to share with friends and family. With edible memories, you can share special photos in a way like never before and make fun party favours, festive cakes, and unique desserts that will knock their socks off. You will be so proud of your creation and amazed at how easy it was to make.
Now that you know the details of photo cakes, why not get started in the making process? for the cake base, we are planning on making a plain and healthy cheesecake while topping it off with your favourite photo cake image!
Cheesecake photo magic!
Plenty of people are unable to resist the magic of eating cheesecake. To achieve that, you will need to have the following ingredients –
- crushed graham crackers,
- melted butter,
- cream cheese,
- white sugar,
- milk,
- eggs,
- sour cream,
- vanilla extract and
- all-purpose flour.
Let’s get baking!
1. Preheat your oven to 350 degrees Fahrenheit, as you will need this temperature to bake your cake thoroughly.
2. The next thing to spot is a 9-inch springform pan. You will be baking your cake in this utensil.
3. The next step for you is to employ a medium-sized mixing bowl and start combining the following ingredients – mixed graham cracker crumbs and molten butter. Once the mixing process is done, and the ingredients are inseparable, start the preparation of the cake base by pressing this thorough mixture into the bottom of the pan.
4. In a bigger bowl, start combining the cream cheese with the sugar until it forms a smooth, consistent mixture. Then add the milk and eggs into it and start mixing these ingredients thoroughly. Finally, combine the sour cream and vanilla essence and sifted all-purpose flour until eventually it is smooth, then pour this into the prepared crust base of graham crackers which might have set by now.
5. Now, time for baking! Once the mixture is poured into the pan, start baking the cake for approximately 70 to 90 minutes. Once the baking is done, kindly let the cake cool off inside the oven for about 5 to 6 hours. Do this inside the oven as the closed compartment inside it will prevent the cake from cracking. Then, transfer this cake inside the refrigerator only after the clean toothpick test and then let it chill for 1 to 2 hours.
6. Once the cake is cool, and you are ready to serve it, only then take the cake out and print the edible image through the designer as a cake topper.
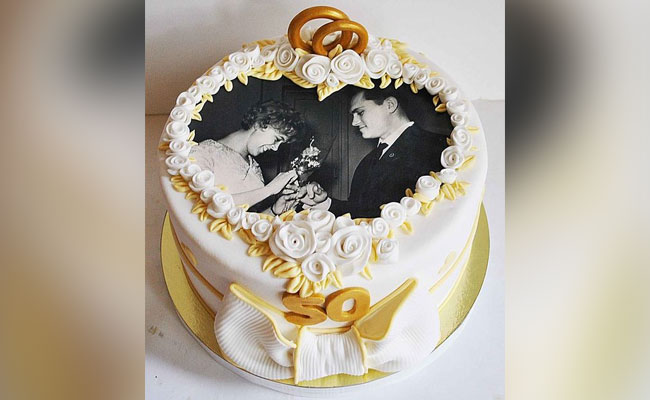
Photo fun frames are available in festive designs to match the theme of your party, as well as designer prints to create professional-looking birthday cakes easily. Edible image designer prints are the greatest decorating tool! Choose from polka dots, stripes, animal prints, holiday prints and more. Designer prints adorn the sides and top of your order cake online or treat. You can purchase pre-cut strips or full sheets to easily cut as desired, allowing you to create all sorts of wonderful and unique desserts. The possibilities are endless.